
Japanese Dashboard Project
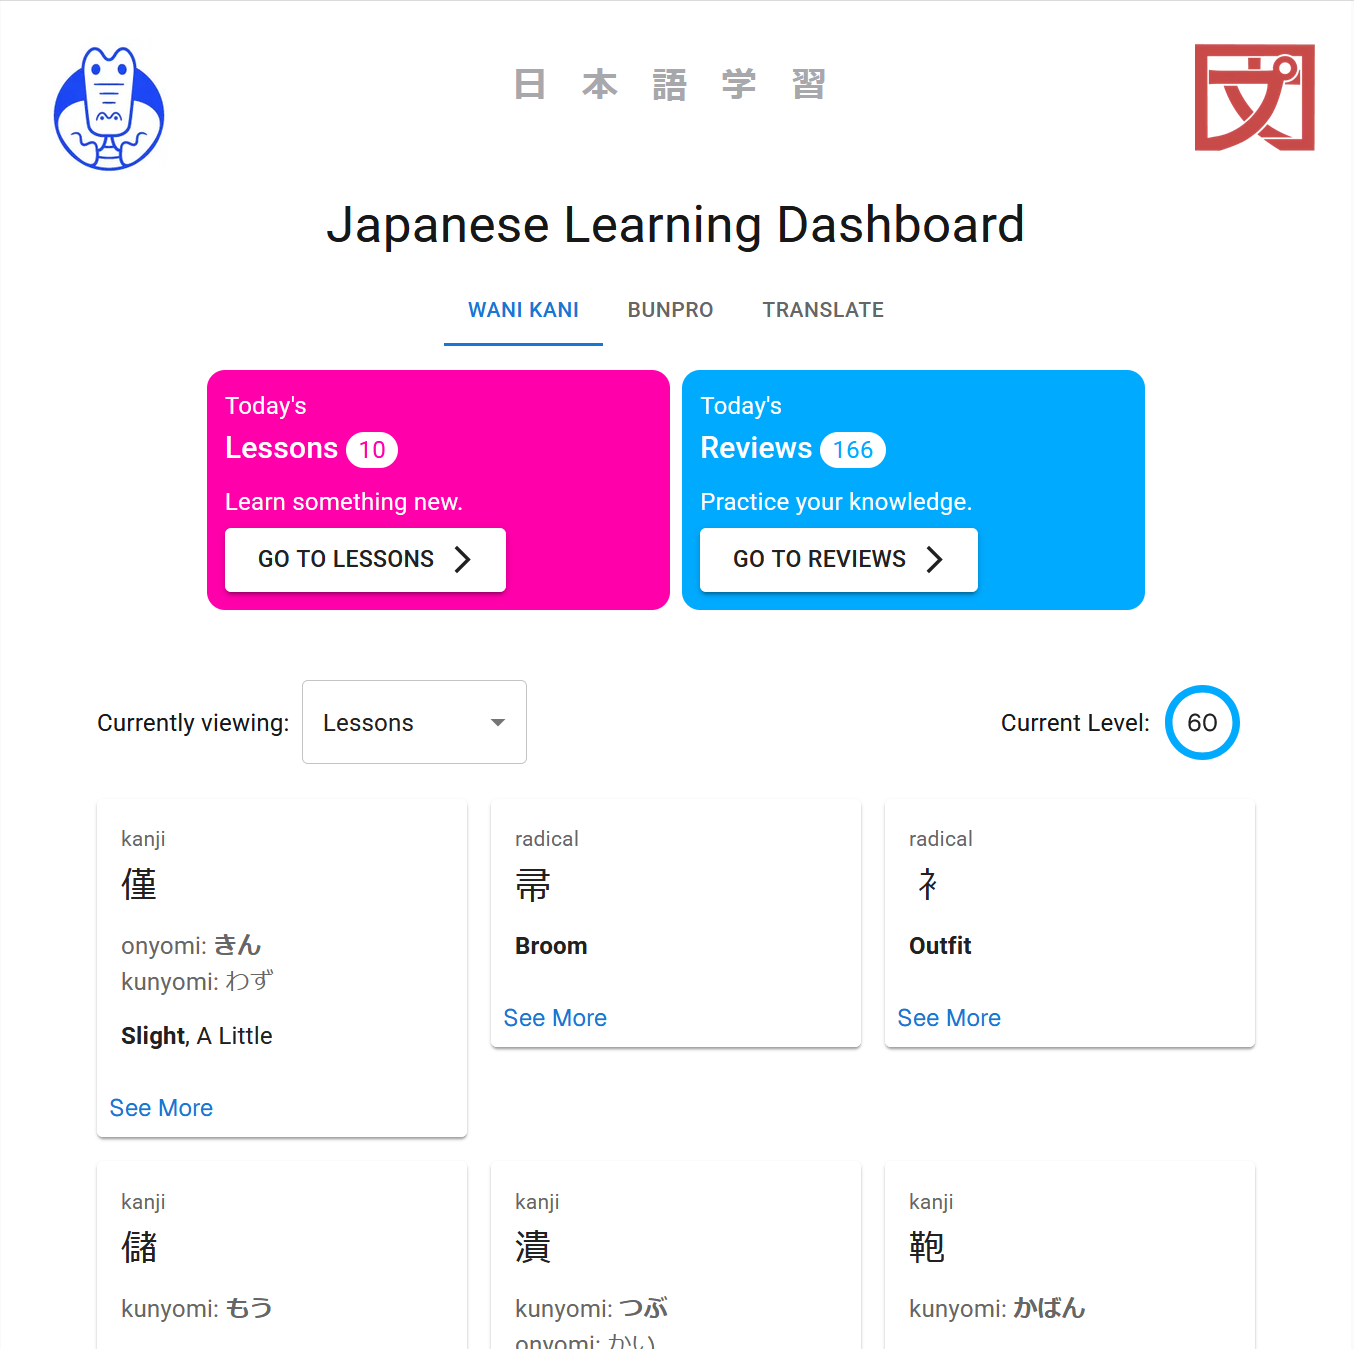
I use WaniKani and Bunpro to study Japanese. WaniKani teaches you the kanji characters that form Japanese words, while Bunpro teaches grammar and sentence structure. Both sites prepare you for the JLPT, a standardized test for Japanese learners. I decided that seeing my combined progress in both apps would be convenient and set about designing a dashboard. The full code can be found here.
Planning Stage
WaniKani provides API keys for personal use. They also have excellent documentation for their REST API. You can fetch user info, quiz scores, and in-depth review content. I was able to quickly identify which endpoints my app would use.
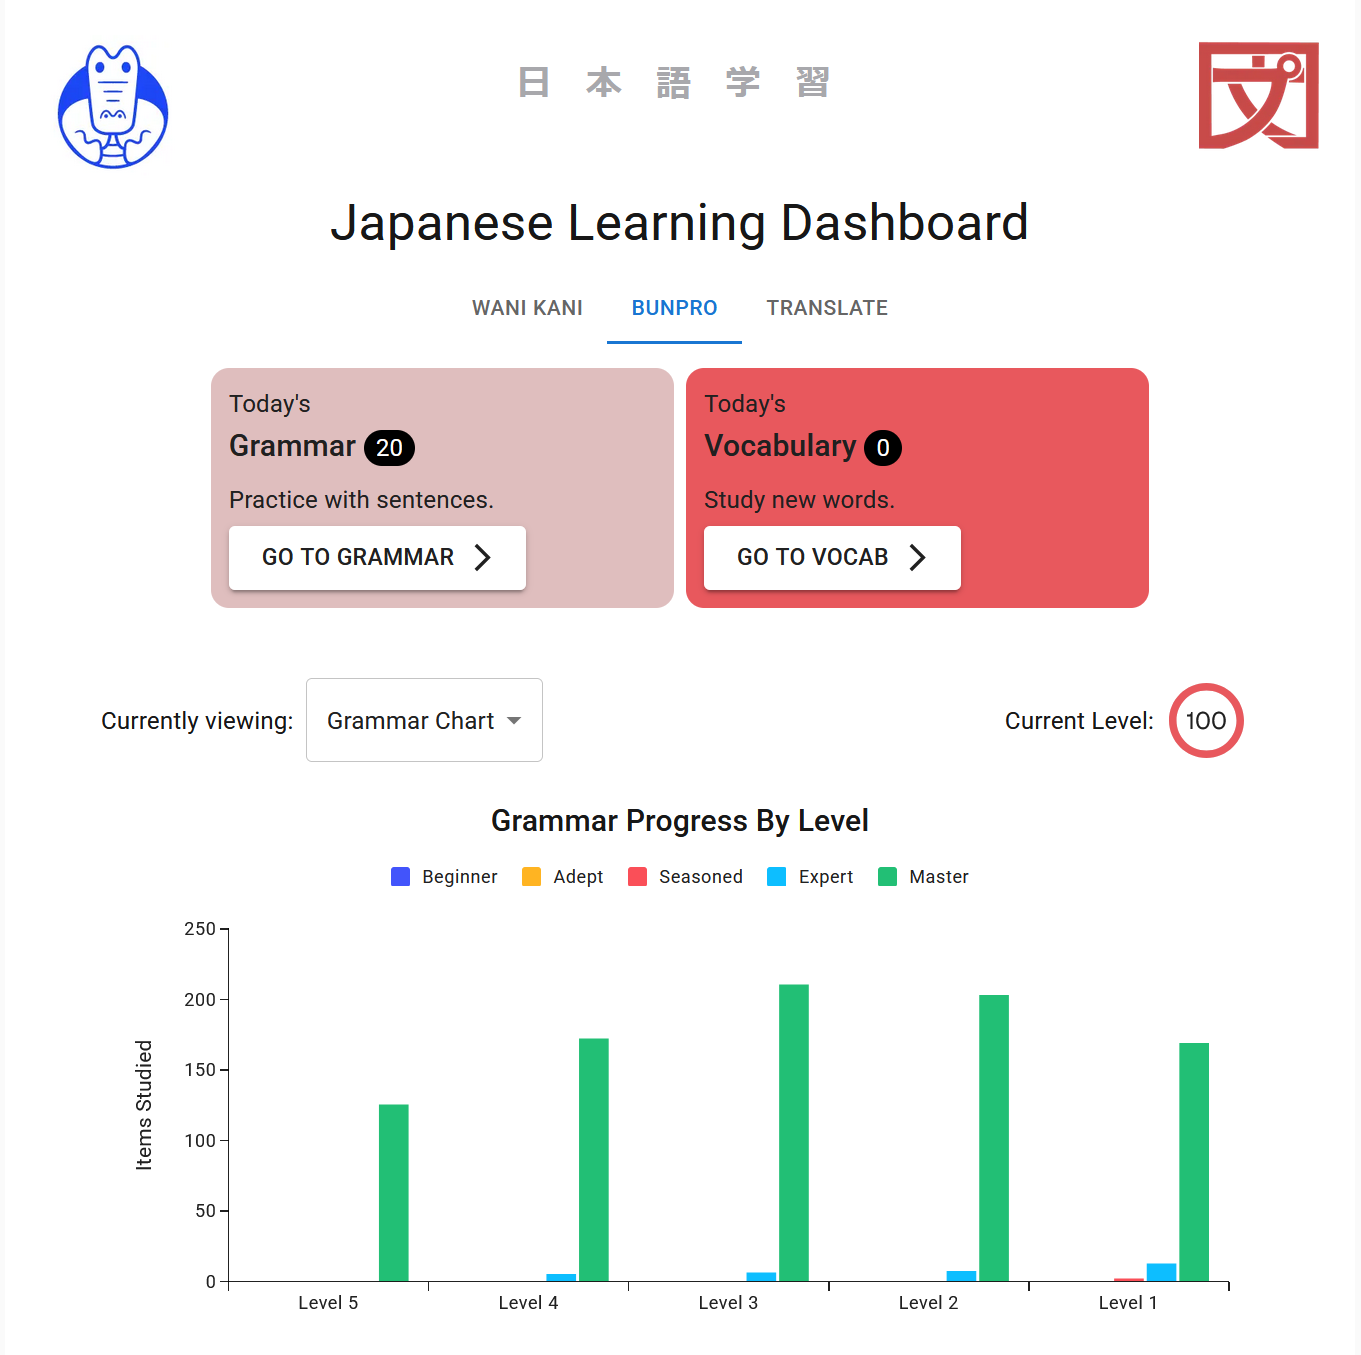
Bunpro was trickier. They retired their public API years ago and don’t provide keys. The best you can do is extract a session cookie from your browser while logged in. This grants access to all the public endpoints used by the Bunpro frontend. I compiled a list by monitoring the Network tab of my browser, then decided which ones were useful for the app. Now I had a list for both Bunpro and WaniKani.
Feeling greedy, I also wanted a Japanese-English translation tool. Whenever I found a new Japanese word, I opened a browser window and plugged it into Google Translate. A built-in translator would really suit the the “all-in-one” spirit of my dashboard.
LibreTranslate immediately stood out as a solid option. Setup is simple - you just install it with apt-git and invoke it from the command line. This starts a local server that machine-translates any text you submit. I could launch it in the same Docker container as my web app.
Now I was ready to think about tooling. I was interested in server-side rendering but had never used it at work. I figured Next.js would be a good entrypoint since it’s feature-rich and well-documented. I also found a powerful component library called Material UI that looked perfect for designing a dashboard. It had graphs, tabs, and even styled boxes that looked like flashcards.
Getting to Work
First I laid out some basic shapes on a page. These were placeholders for real content; I figured page layout should come before anything else. Jumping straight to component design would cause problems if things didn’t fit together.
I also decided that WaniKani, Bunpro, and translation should all go in separate tabs. This would reduce visual clutter and let me style them differently. WaniKani had hundreds of lessons to display, while Bunpro had statistics that lent themselves to graphs. The translation UI would just be a simple side-by-side layout.
Lessons Learned
My biggest impediment by far was silly and preventable. LibreTranslate is a massive install that kept getting corrupted halfway through my Docker build. I spent hours troubleshooting until I realized my own VPN was the culprit. I use it in public places like liraries; apparently it was dropping packets during installation. I messed up by not considering the obvious explanations first.
Next.js also has a bit of a learning curve. Since the client and server render different parts of a webpage, you have to manage more “moving parts” than normal React. For example, the use client directive tells Next.js to render something on the client side, required for anything with event handlers. I forgot this several times and wound up with hydration errors. I also had a problem where client and server were assigning different names to the same elements. Turns out this is known behavior in Material UI - you solve it by introducing a name cache that both sides can use.